
It is fun to do something creative with Ortur Laser Master 2 Pro laser engraving machine, but sometimes you may get a “homing fail” error. How to do the homing setting? Here are some step-by-step solutions to fix the homing fail problem.
Please note that the following solutions will not differ by the firmware version of your Ortur laser master 2 Pro engraving machine. No matter your Ortur laser engraver uses firmware 1.5 or firmware 1.8, you can fix the homing fail accordingly.
There are two situations that will cause a homing fail.
1. The emergency button was pressed down
When the laser module cannot return to the original point (homing fail), the first thing to check is the emergency button. If it’s pressed down, rotate the button clockwise and the button will lift automatically. Then you can try again.

2. Wrong homing setting
Here are the steps of Ortur laser master 2 pro homing setting.
Step 1: Connect your computer to Ortur laser master 2 pro laser engraving machine
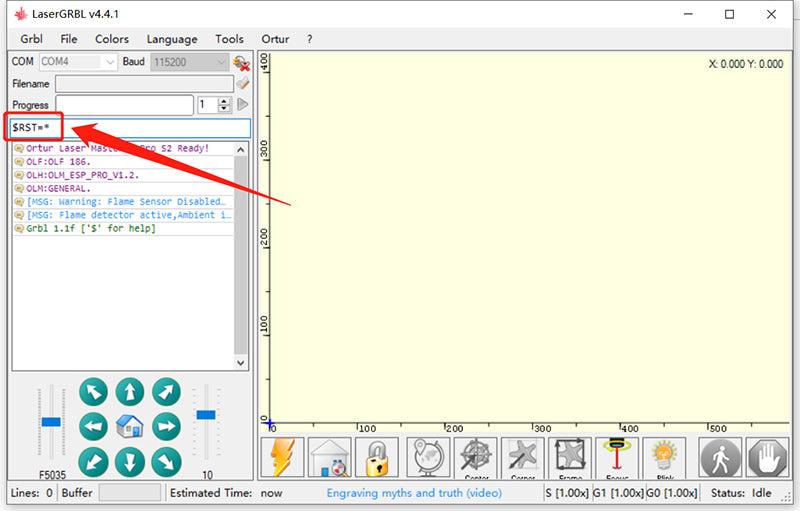
Step 2: Type in the code in the command window:$RST=* , then click enter.
The specific operation is shown in the figure below:
Input code:$RST=* , then click the enter button
If a green tick is displayed in the command log window, the homing setting is successful. Otherwise, the homing setting fails.

If it fails, please go on with step 3.
Step 3: Click the Grbl option in the upper left corner, choose “settings”.
Enter the settings page. Check if the settings are consistent with the following figures. If not, please correct them.

Step 4: Click the grbl option in the upper left corner, select “Grbl Configuration” to enter the parameter setting page. Check if the value $22 is 1

Step 5: If the value $22 is 1, turn off Ortur laser master 2 pro laser engraving machine and start it again. The laser module will return to its original place automatically.


