


- CONNECT
- CONNECT 2
- ENGRAVING & CUTTING
Mobile phone connected to machine WiFi.
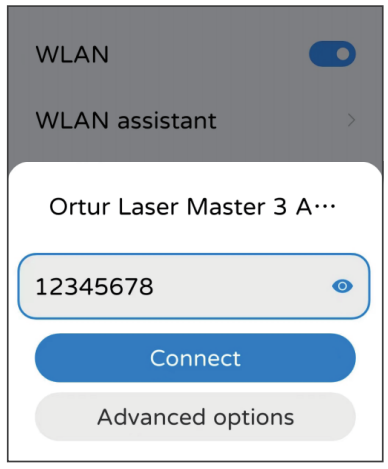
The WiFi name of the machine starts with "Ortur Laser Master 3". WiFi password is "12345678".
Note 1: The mobile phone cannot access the Internet when the machine's WiFi is connected.
Note 2: If there are multiple OLM3s in the power-on state and you can't tell the name of the machine's WiFi, please enter the code "$310" in the console of the control software of the computer, and click Enter to view the name of the WiFi.
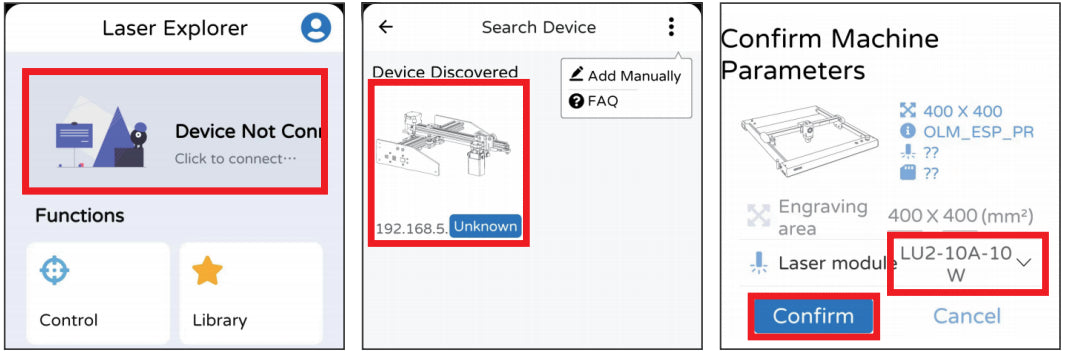
Click the options in the red box in order from left to right.
Note : The correct laser module must be selected!
The phone and the machine are in the same local area network.
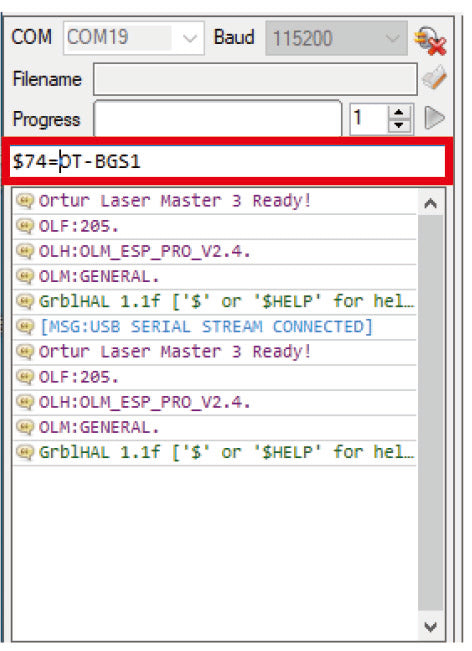
1. Connect the machine to LaserGRBL, enter "$74=WiFi name" in the red box, and then click Enter.
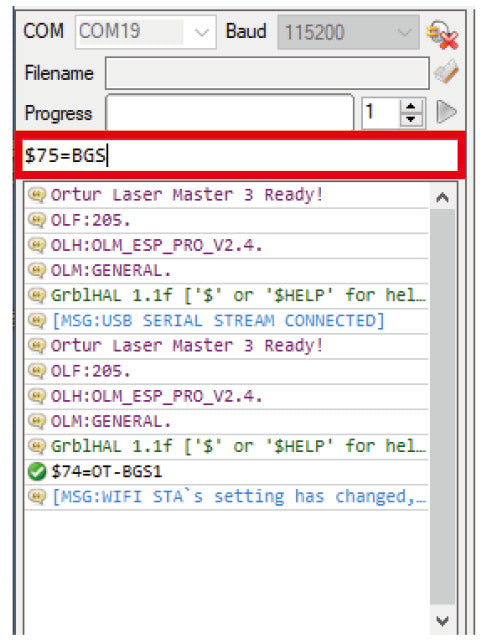
2. Enter "$75=WiFi password" in the red box, then click Enter.
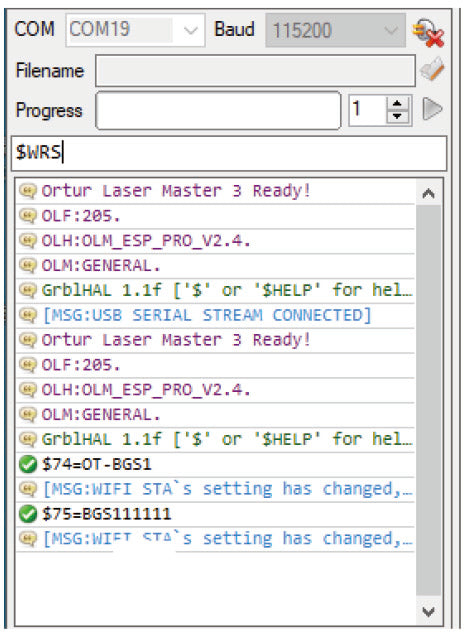
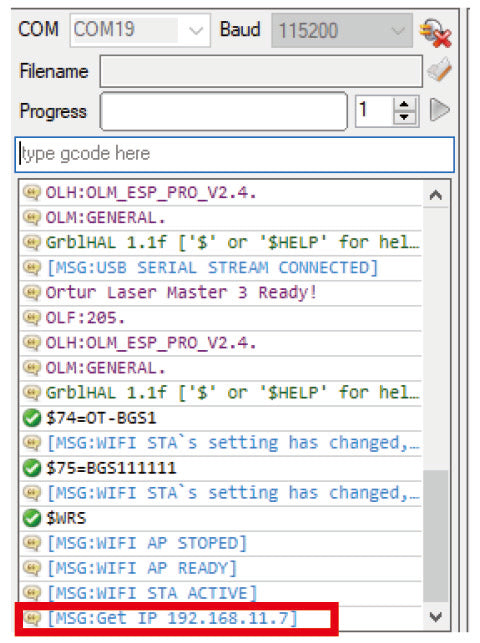
3. Enter "$WRS" in the red box, then click Enter.
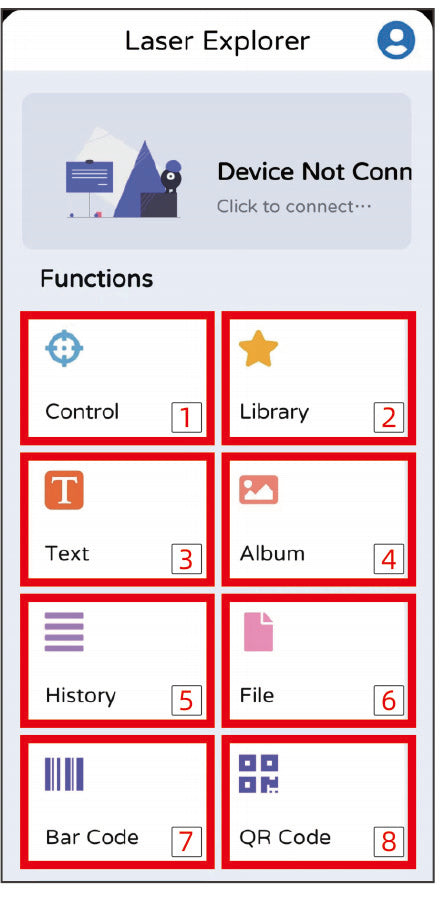
1. Control (Control the movement of the machine)
2.Library (software comes with images to choose from)
3.Text (software comes with a text editor)
4.Album (can view and select images in the phone album)
5.History (used data can be called directly)
6.File (can read engraving file)
7.Bar Code (software comes with barcode editor)
8. QR Code (the software comes with a QR code editor)
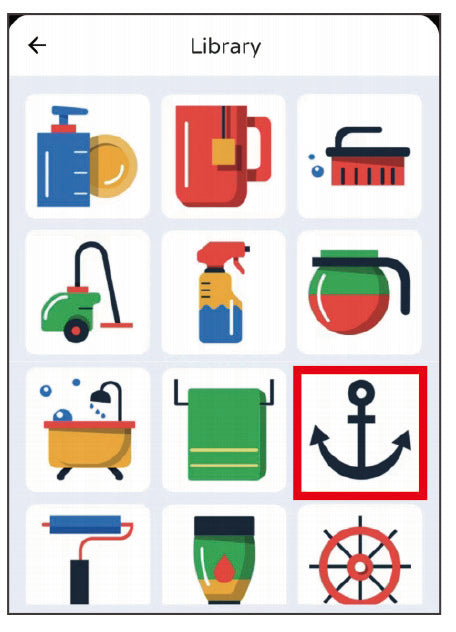
Choose an image arbitrarily.
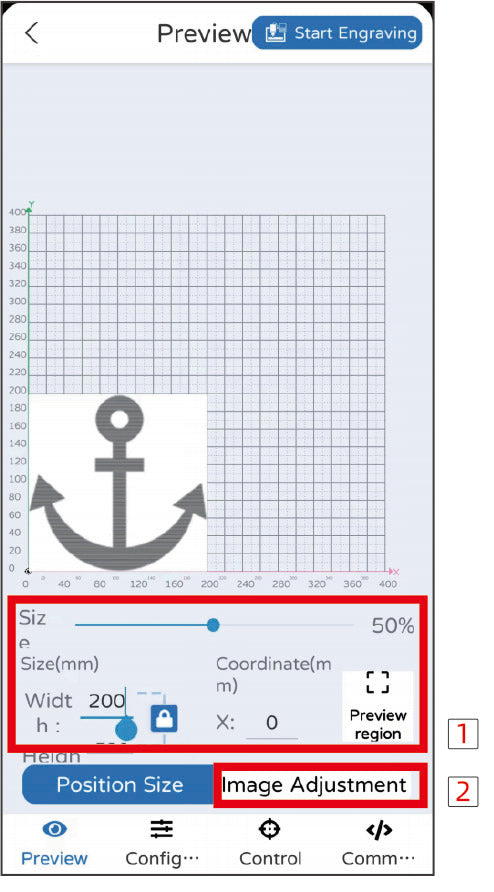
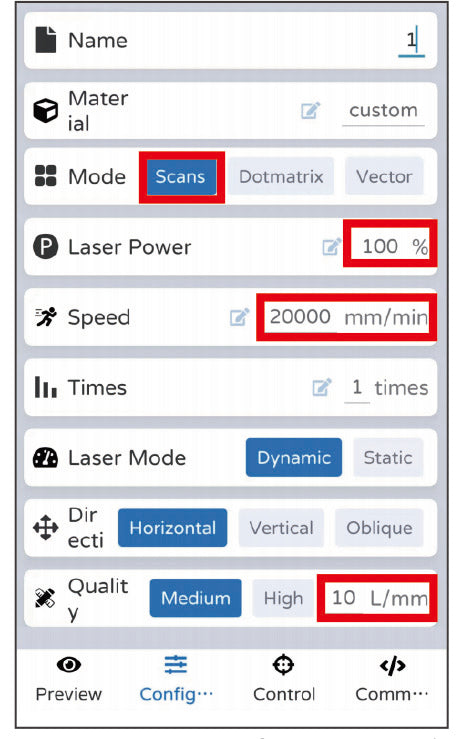
1. By modifying the parameters in the red box, you can change the size and position of the image, as well as the engraving range of the preview image.
2.Modify the parameters in the red box to change the brightness, contrast and black and white limits of the image.
Note: The parameters are for learning reference only, and the actual use will be affected by factors such as material and thickness! Please do more tests according to the actual situation!