-
Open the LightBurn and connect to the machine
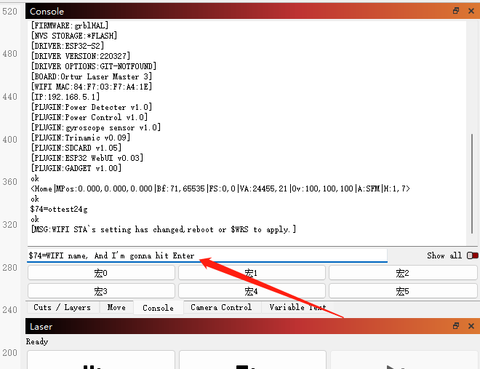
In the console:
Enter the code; "$74=WIFI name" (for example: $74=ottest24g), and click Enterdisplay OK indicates the setting success
Enter the code; "$75=WIFI password" (for example: $75=test1234), and then click Enter, display OK indicates the setting success.
Finally, enter the code: "$WRS", and then click Enter, display OK indicates successful setting.The $WRS code is simply understood as a refresh.Refrefresh can obtain an IP address.
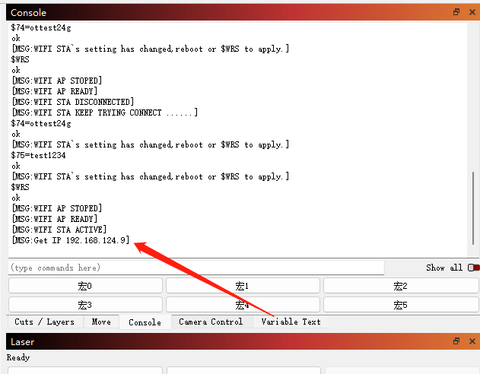
Open the browser, enter the website bar, enter the IP address obtained above, such as "192.168.124.9", and then click Enter

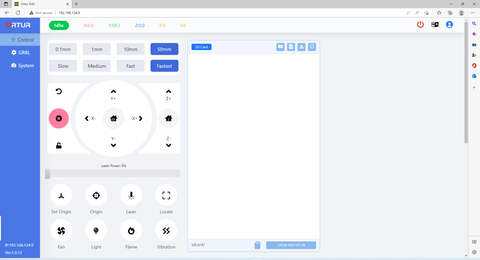
Enter the default account: "admin", the default password: "admin", and enter the operation interface

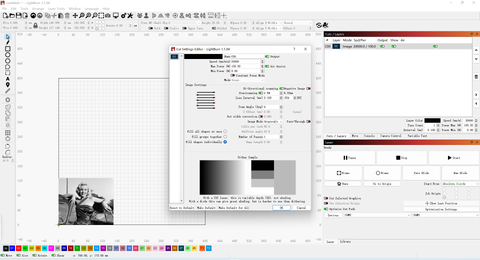
1.)Ggode files required to make web control engraving in LightBurn software
Import the pictures that you need to engrave, and set the engraving parameters, and finally click “OK”
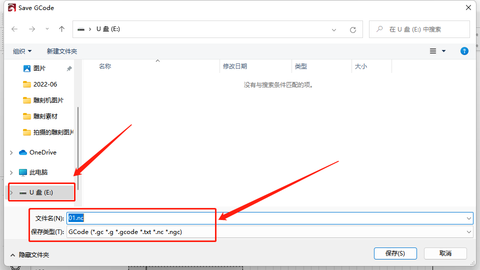
(2)Click Save Program, save as to. End with nc suffix to U disk (this U disk is TF card on the machine)


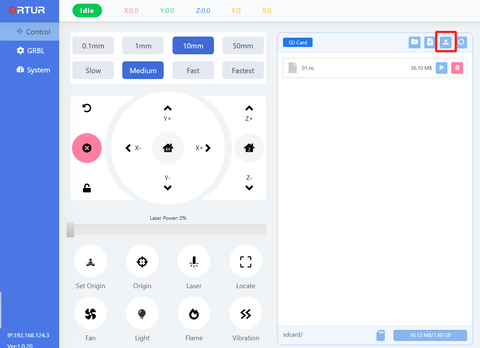
(3)Select the G-Gode file in the webUI

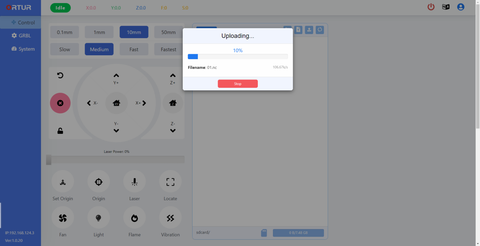
Wait to upload...
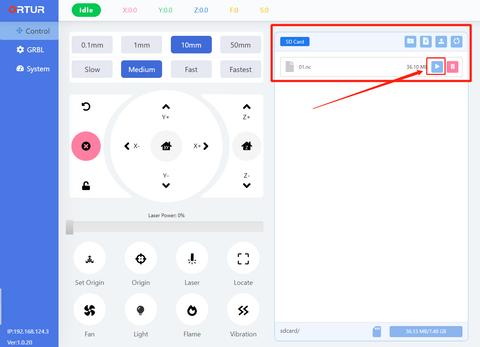
- Select the file required to be engraved
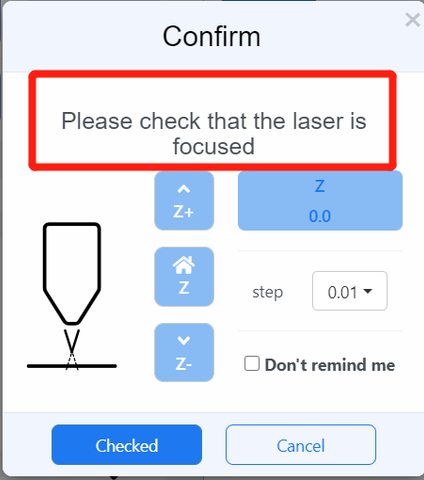
As indicated, the laser module was focused.The distance after focus is the best distance between the laser module and the engraved surface
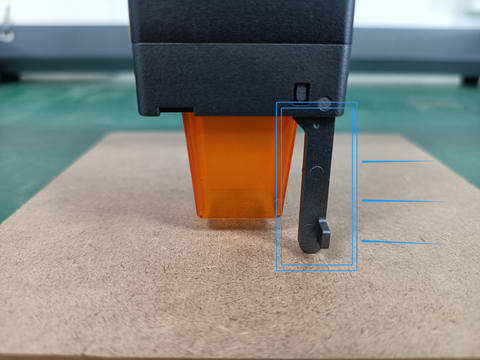
Manually move the laser module to the start position of the engraving and click "Next" to the next step

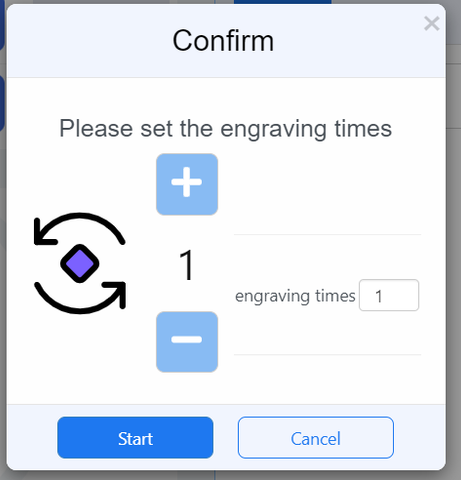
Set the number of engraving, generally is the default 1 times.Then click the "Start" button to the next step.
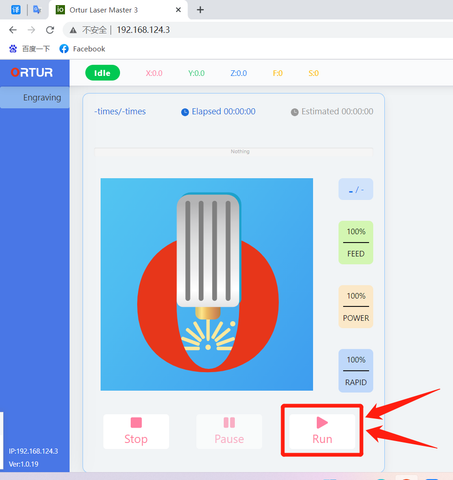
2. Click "run" to start carving
3.Thank you !