After 10,000 hours of use, the laser's power drops by 15%, but it can still be used for simple engraving. Every 50 hours of operation, the laser should be cleaned with alcohol cotton to maintain its optimal performance.

We're so glad you asked!
Here we have compiled a treasure trove of information about our laser machines ~
Nitty gritty technical questions? Please see below;
Easy-to-use shipping and billing basics? Please see below.
ABOUT MACHINE
- Machine Using
- Materials
- Machine – to – Machine Comparison
- Product Service
Q1: How long is the lifespan of the machine?
Q2: When the laser is cutting, is it right to select the maximum power directly? Or by cutting multiple times?
It varies for each application. It all depends on what you have to work with. Easy-to-burn and hard-to-burn materials are the most common classifications. You also need to keep an eye on the cutting edge's condition.
Cut-through speed and laser power are both critical considerations. For example, cutting at high power and fast speed is recommended for wood-based bamboo acrylic. Chopping at modest speeds and using low-power tools. Burnt edges can be caused by too much power and too little speed. In the user guide, we also go through a few cutting parameters.
Q3: Is the process of using safe?
1.If the engraving machine is shifted or slanted, the laser operation will immediately be stopped to avoid the laser from firing out the target and inflicting harm;
2.Laser Beam Safety Guard: If the engraving machine or computer malfunctions, the laser beam will continue to emit light and cause the target to catch fire.
3.Protective measures will be taken if the laser has been turned on, but there has been no movement for a long time. When used in low light, the laser will shut off after 100 seconds; when not used in low light, it will shut off between 10 and 60 seconds, depending on the power. A few seconds later, the laser will be turned off.
4.The mainboard will monitor the laser module's input and output current, which will cut off power to the laser module and motor after shutdown. A power source will also be disconnected if it receives an inappropriate amount of voltage.
5.Detection of fire with buzzer alarm
6.Emergency Stop Button
Only the PRO S2 models can be equipped with the (flame detection and emergency stop switch)
Q4: What is the engraving size?
OLM2 PRO S2 400X400MM/OLM2 S2 390X410MM/AL2 390X390MM/AL1 180X180MM
Q5:About the Scalable functionality of ORTUR?
1.Plug the TF card into the offline control panel and chop the picture into Gcode command files to engrave offline. To control the engraving, you can alternatively connect to the computer via the WIFI function of the offline control panel instead of using a USB cord. - research and development
2.Second, the Z-Axis Lifting Device (easy to focus, but it will increase the weight of the laser head and affect the engraving speed.)
3.Rotating Rollers on the Y-Axis (this device is needed to engrave cylinders)
4.The casing is wholly encased (If your working space is not enclosed, you need to purchase this fully-enclosed protective cover to fully protect the machine and prevent any visitors from touching the device)
Q6:Which engraving software is supported? How to download it?
One of the most widely used free and open-source engraving programmes, LaserGRBL only works with window systems. LaserGRBL has put the Ortur engraver through its paces. Using LaserGRBL, users can easily access the Artur laser engraving machine's parameters.
LIGHTBURN is a paid software, which costs between $50 and $60 each year, and is compatible with Mac, Linux, and Windows systems.
LaserGrbl (Free)(Windows XP, Windows 7, Windows 8, Windows 10): Download Page
LightBurn (Paid-30 Day Free Trial)(Mac OS, Linux, Windows XP, Windows 7, Windows 8, Windows 10): Download Page
LightBurn (Paid-30 Day Free Trial)(Mac OS, Linux, Windows XP, Windows 7, Windows 8, Windows 10): Download Page
Q1: What kind of material can be engraved?
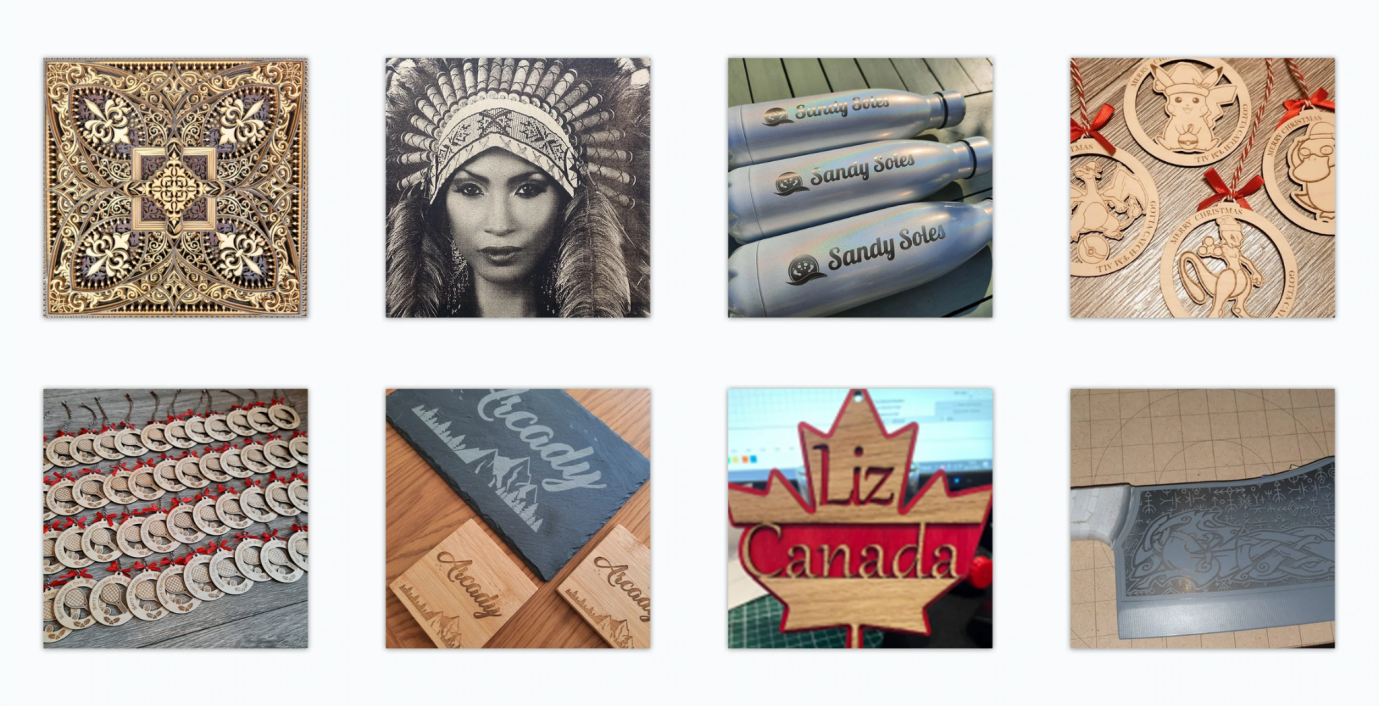
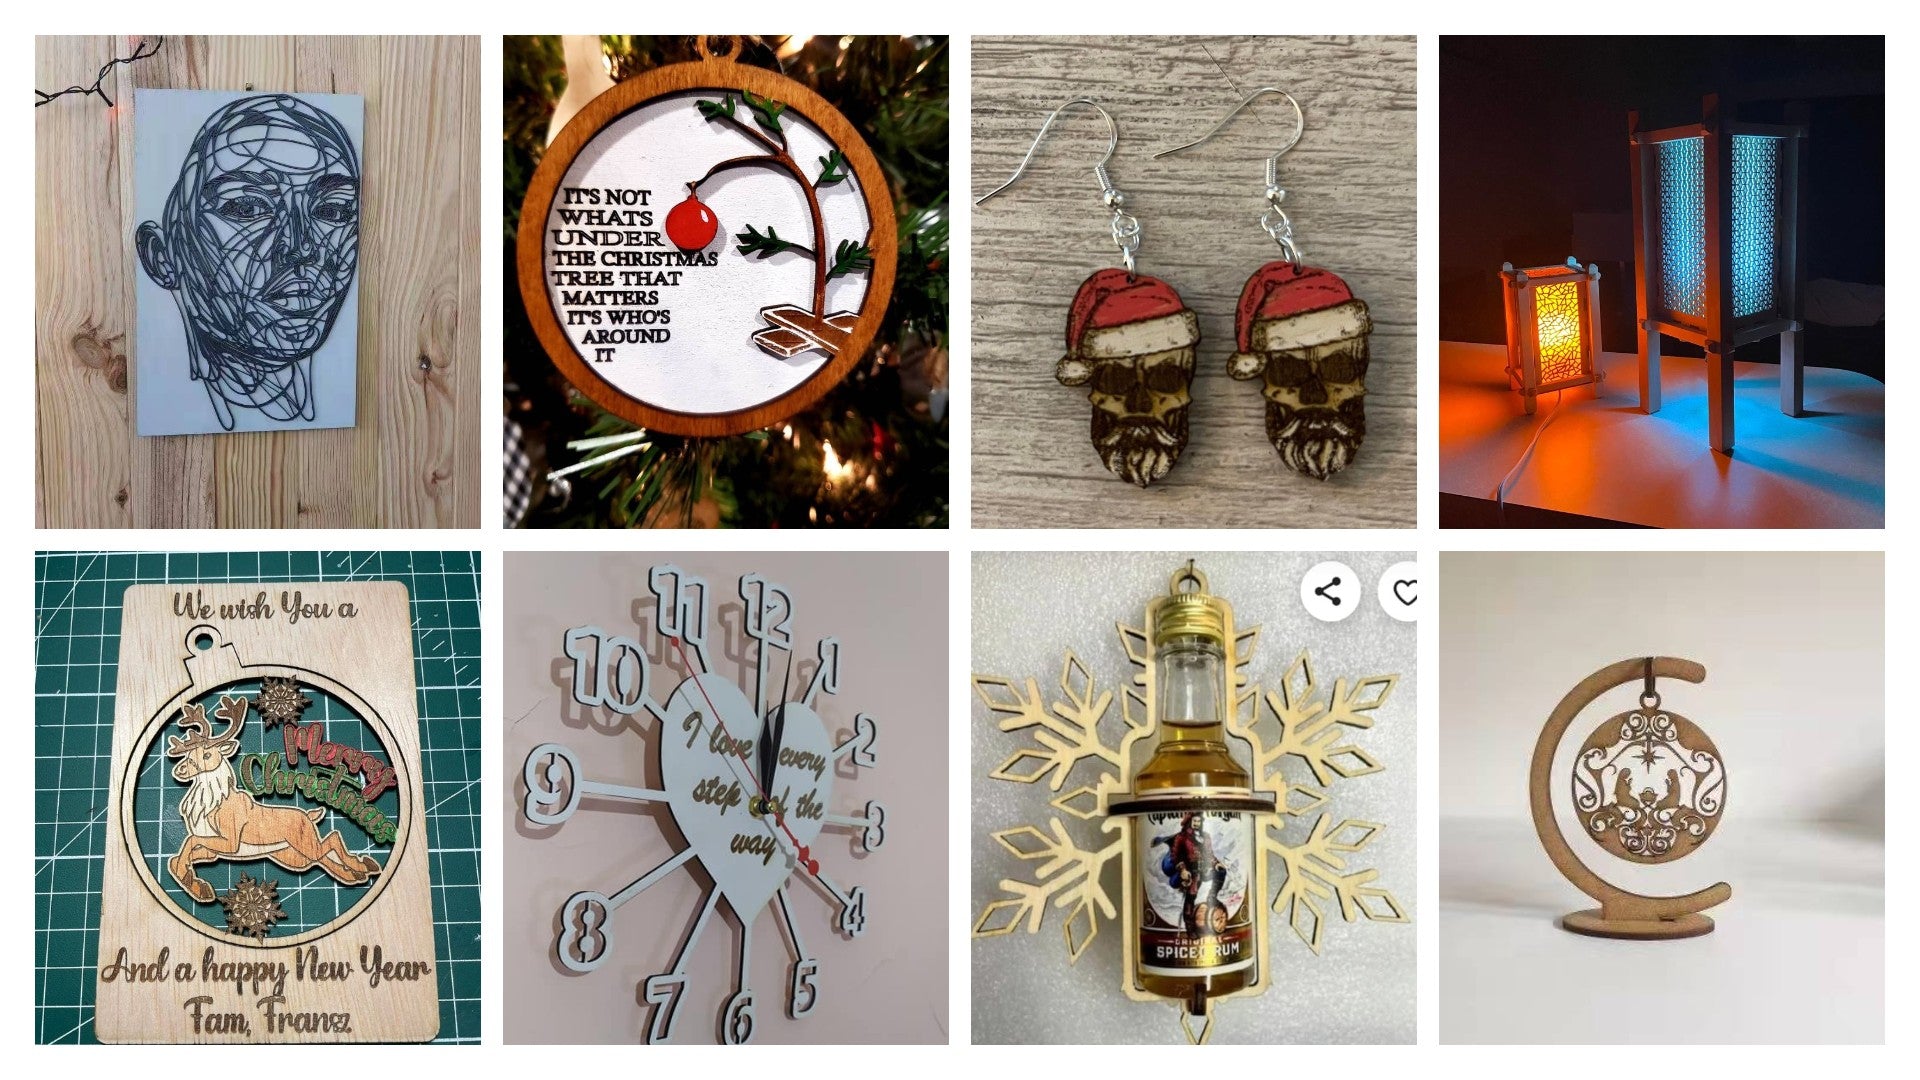
Hard plastic, leather, canvas (not cotton), kraft paper, black lacquered metal/ceramic/stone, glass (need to be blacked out), and food are all acceptable materials.
Q2: What kind of material can be cut? How much is the thickness?
Cardboard, Felt, Stickers, Wood, Acrylic, Bamboo, Cloth, Kraft, Hard Plastic, and Leather.
A black acrylic (12 mm) wood board has the maximum cutting thickness (20mm).
They both require a significant number of engravings.
Q3:Can the PCB board be cut?
It is possible to cut PCBs from acetate using the ORTUR laser. Preference would be for either black or green.
Q4: How to use a laser to cut mirror acrylic? Is it possible?
Acrylic that is both opaque and reflective can be sliced. It is impossible to cut transparent materials; the only way to engrave them is to blacken them beforehand.
Q5: Can it engrave metal and stainless steel?
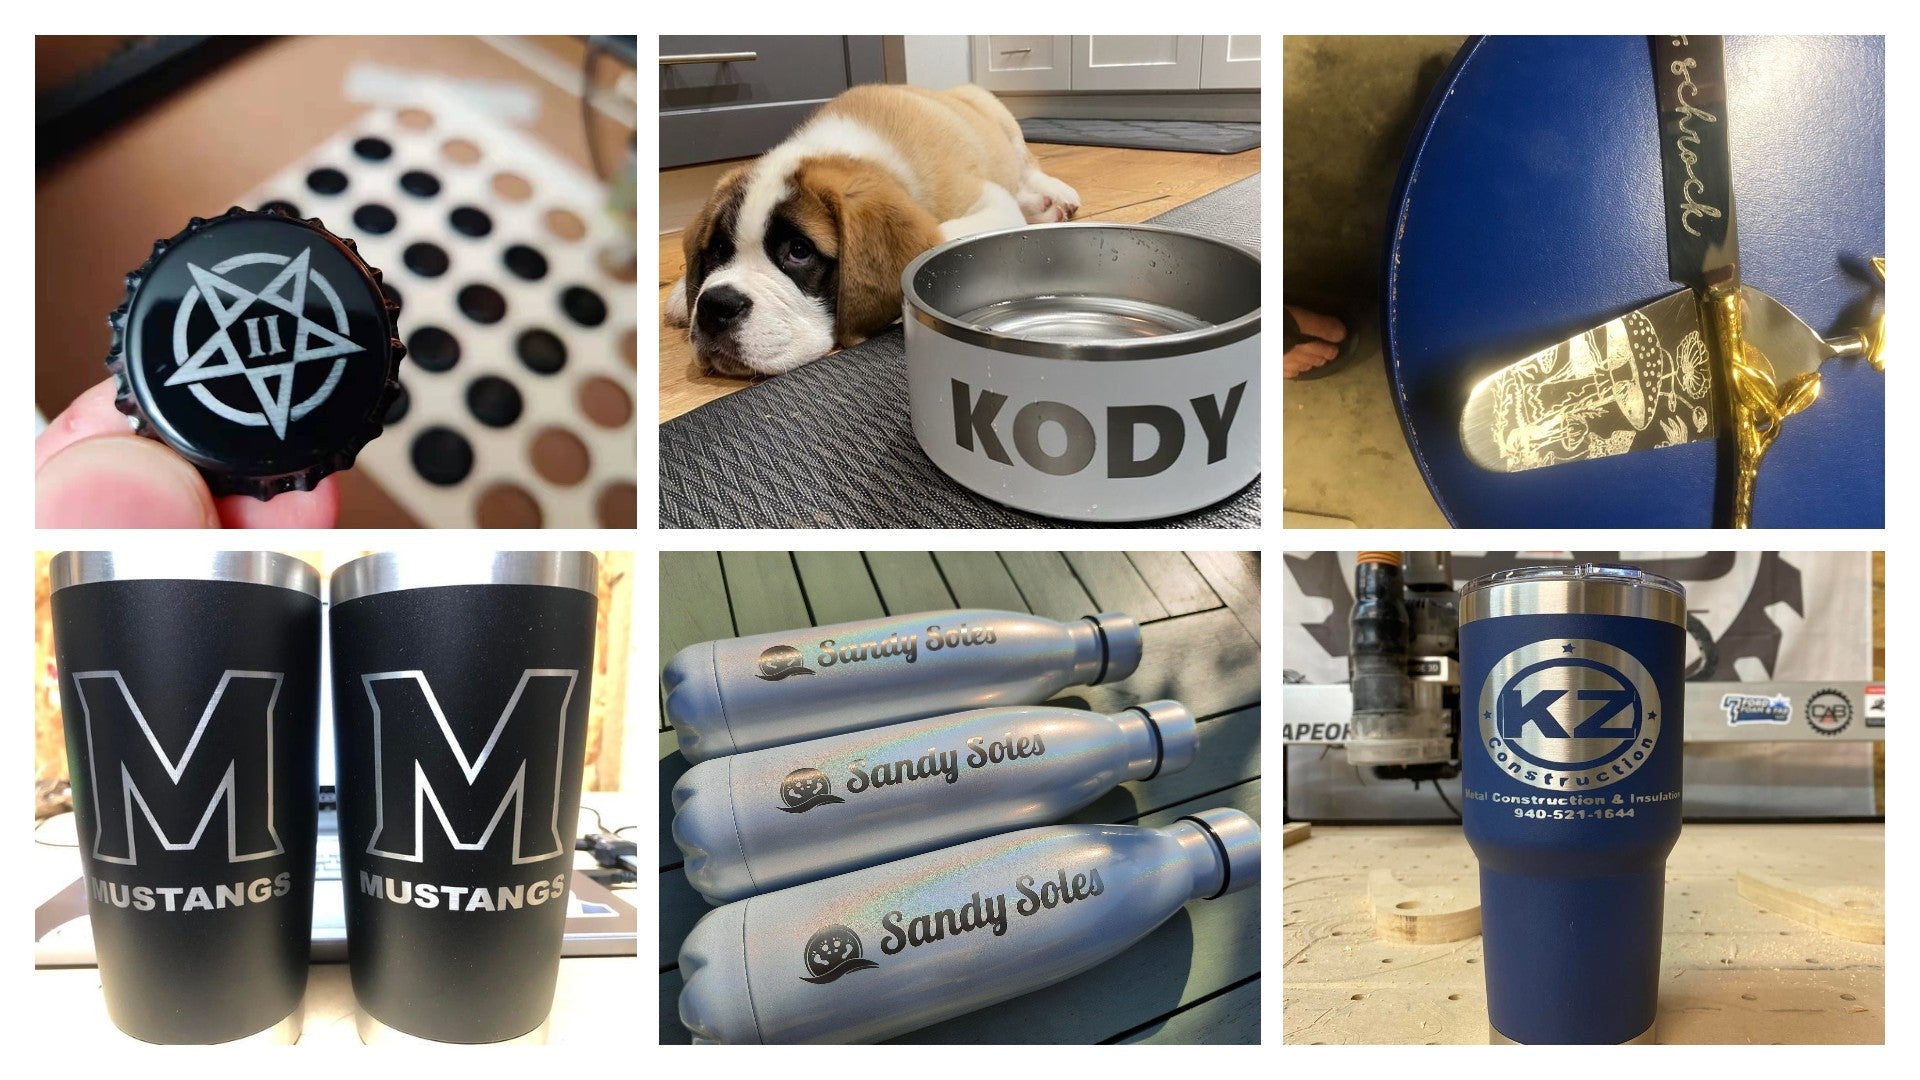
Engraving can be done on stainless steel after electroplating or spraying (for coating or oxide layer) (the effect of stainless steel is better after blackening, note: not etching, but discoloration)
Q6:Can it engrave on the glass?
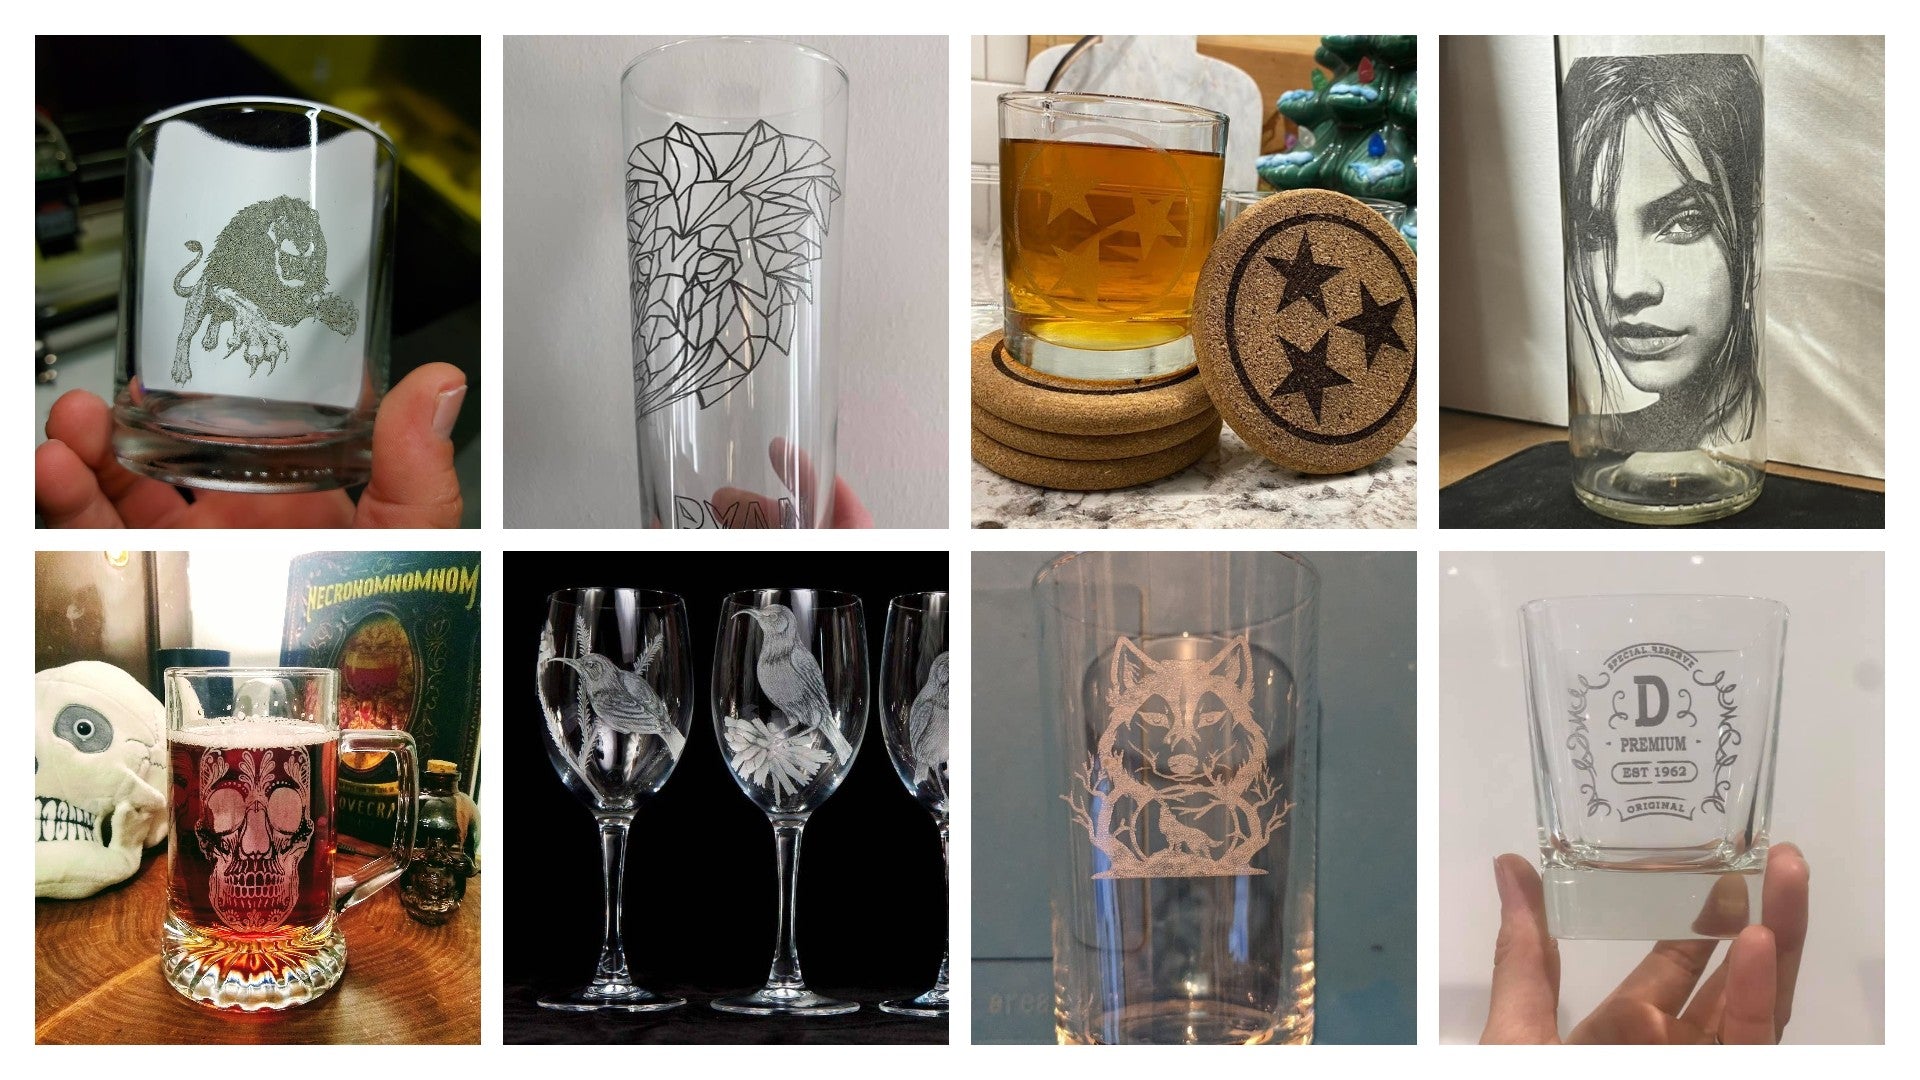
Even though the laser can engrave on glass, the engraving depth is too shallow to allow it to cut. Glass etching is a challenging process to master. Following these methods will result in a smoother frosted surface: Place a piece of thermal paper on top of the engraved area to flatten it and remove any creases. After carving the glass, remove it from the engraving machine, remove the thermal paper, and clean the engraved glass. The engraving effect is excellent when done with the first layer of paint engraving and then wiping it off.
Q1: Which is the Better Laser Engraving Machine: Ortur Laser Master 2 Pro vs. Aufero Laser 2?
| ||
Product Picture | |
|
Motherboard | OLM - MAXUP - V10 Motherboard, | OLM - PRO - V1.2 Motherboard, with 32Bits ESP32MCU |
Firmware | V1.8 Firmware | V1.8 Firmware |
Safety Precautions | 1. Active Position Protection | 1. Active Position Protection |
2. Exposure Duration Detection and Limitation | 2. Exposure Duration Detection and Limitation | |
3. Laser Beam Safety Guard | 3. Laser Beam Safety Guard | |
4. Flame Detector | 4. 24V Power Delivery System | |
5. Emergency Stop Button | 5. Power control system: if shutdown the machine, it would cut the power | |
Support Add-ons | 1. Ortur Control Box (Offline Controller) | 1. Aufero Control Box (Offline Controller) |
4. Detachable Cover | ||
Frame Materials | Aluminum + Powder Coated Steel | Aluminum + Acrylic |
Motors | NEMA 17 Stepper Motors | NEMA 17 Stepper Motors |
Mechanical Precision | Y: 12.5um, X: 12.5um | Y: 12.5um, X: 12.5um |
Pixel Accuracy | Adjustable | Adjustable |
(Default: 300 pixels per inch, about 0.81um Pixel Accuracy) | (Default: 300 pixels per inch, about 0.81um Pixel Accuracy) | |
Engraving Area | 400mm * 400mm | 390mm * 390mm |
Available Laser Modules | Ortur LU2-4-SF 24V/2A (2nd Generation FAC , Luminous Power: 4,500 - 5,000mw) | Aufero LU2-4-SF (Luminous Power: 4,500-5,500mw) |
Ortur LU2-4-LF 24V/2A (2nd Generation FAC , Luminous Power: 4,500-5,000mw) | Aufero LU2-4-LF (Luminous Power: 4,500-5,500mw) | |
WaveLength | 445 ± 5nm | 445±5nm |
Focus | Fixed Focus | Fixed Focus |
Default Focal Length | 50mm | 50mm |
(from the heat sink to the object) | (from the heat sink to the object) | |
Control Mode | PWM | PWM |
Power Rate | S0 - S1,000 | S0 - S1,000 |
Engraving Speed | 0 - 10,000mm/min | 0 - 10,000mm/min |
Baud Rate | 115200 - 921600 (Default: 115200) | 115200 - 921600 (Default: 115200) |
Computer OS | Win XP, Win 7, Win 8, Win 10 (LaserGRBL) Mac and Linux (LightBurn) | Win XP, Win 7, Win 8, Win 10 (LaserGRBL) Mac and Linux (LightBurn) |
Control Softwares | LaserGRBL (free), LightBurn (Paid Software) | LaserGRBL (free), LightBurn (Paid Software) |
Input Format | JPG, JPEG, PNG, BMP, SVG, etc. | JPG, JPEG, PNG, BMP, SVG, etc. |
Available Materials of Engraving | Wood Board, Paperboard, Black Acrylic, Leather, Food, Stainless Steel, Powder Coated Metal, etc. | Wood Board, Paperboard, Black Acrylic, Leather, Food, Stainless Steel, Power Coated Metal, etc. |
Available Materials of Cutting | Wood Board, Paperboard, Black Acrylic, Leather, Felt Cloth, Dark Color Plastic Sheet (Melt), etc. | Wood Board, Paperboard, Black Acrylic, Leather, Felt Cloth, Dark Color Plastic Sheet (Melt), etc. |
Input Voltage | 110V-220V (Compatible) | 110V-220V (Compatible) |
Power Adapter Output | 24V/2A | 24V/2A |
Operating Temp. | -20°C - 50°C | -20°C - 50°C |
Color | Black | Silver |


Q2: Whether Aufero Laser 1 the upgraded model of Aufero Laser 2?
The Aufero Laser 1 and the Aufero Laser 2 are not the old and the new models but distinct machines for different consumers.
Aufero Laser 1 is designed for clients who are just starting and are on a budget.
It costs more, but the engraving area is more significant, and you have to put it together yourself if you choose the Aufero Laser 2.
The Aufero Laser 1 is a midsize sedan similar to the Ford Focus.
The Aufero Laser 2 is comparable to Ford's Mondeo sedan.
These aren't relationships of substitution or competition; instead, they're directed at clients with varying budgets.
To signify Ortur's improved model, which includes new firmware and hardware, the model will now have the suffixes S2 and S3 following its name. If you're looking for an updated version of Ortur Laser Master 2 S2, you'll find it here.
Q3:What's the difference between the S2(Ortur laser master 2S2) and PS2(Ortur laser master 2 PRO S2) models?
Engraving area: S2-390MMX410MM PS2-400MMX400MM
Engraving speed:S2-5000mm/min is the max PS2-10000mm/min is the max
Motherboard :PS2 use the 9th Ortur Laser Motherboard, with 32Bits MC,which is the newest tech in Ortur.
Safe:
S2:
1.Active Position Protection,
2.Exposure Duration Detection and Limitation,
3.Laser Beam Safety Guard.
4.Power Control Systerm
PS2:
1.Active Position Protection,
2.Exposure Duration Detection and Limitation,
3.Laser Beam Safety Guard.
4.Flame Detector
5.Emergency Stop Button
6.Power Control System
Q4: Is there any difference or advantage between ORTUR laser and Other Excellent Laser Engravers?
The ORTUR series has several advantages over the Other Laser Engravers series, such as a more detailed design of the structure, a sharp focus, square feet, suitable accessories, eye protection, etc. And we've designed our software. At any point, the machine can "develop," and the engraving result will get better and better if the firmware is kept up to date.
ORTUR PS2 includes a power switch enabling a quick shut down of the system (Other Laser Engravers does not). The main board consists of an expansion interface for the XYZ limit switch.
ORTUR's Z-axis focus mechanism is simple and reliable and requires just human control (no tools required, much faster than Other Laser Engravers). The focusing process takes a few seconds, making it one of the fastest in its category.
PS2 is more convenient than a square measuring ruler to see the carving in all directions.
ORTUR features a more precise fixed focus mechanism, which provides additional advantages for engraving.
If you're looking for a way to increase productivity, we're your best bet. Our engraving speed is faster than the Other Laser Engravers series.
We offer a safer machine performance than the Other Laser Engravers series; therefore, we are the best option for you if you want to ensure your safety while using the machine.
For the same price as one Other Laser Engravers, you may get three Ortur products, and our safety features and engraving speed are superior to those of the Xtool series.
Q1: Who should I contact with usage questions, the e-commerce seller or ORTUR?
Please contact us at ortur.tech@gmail.com if you have any quiries or concerns since we can assist you directly and promise a timely response.
Q2: How long is your warranty?
All firms selling Ortur items have a one-year warranty; only sinis has a two-year contract).
ABOUT CUSTOMER SERVICE
Click them to learn more.
FAQ-lightBurn
- Aufero1 Beginner's Guide
- Aufero 2 connects to LightBurn -- FAQ
- OLM3 Beginner's Guide
Perfect Service System, Let You Easily Become the Master of Laser Engraving Machine
Laser Explorer APP User Manual
- CONNECT
- CONNECT 2
- ENGRAVING & CUTTING
Mobile phone connected to machine WiFi.
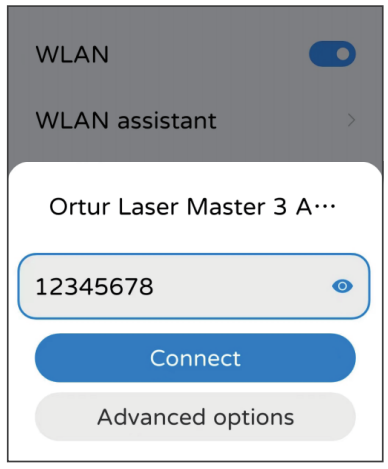
The WiFi name of the machine starts with "Ortur Laser Master 3". WiFi password is "12345678".
Note 1: The mobile phone cannot access the Internet when the machine's WiFi is connected.
Note 2: If there are multiple OLM3s in the power-on state and you can't tell the name of the machine's WiFi, please enter the code "$310" in the console of the control software of the computer, and click Enter to view the name of the WiFi.
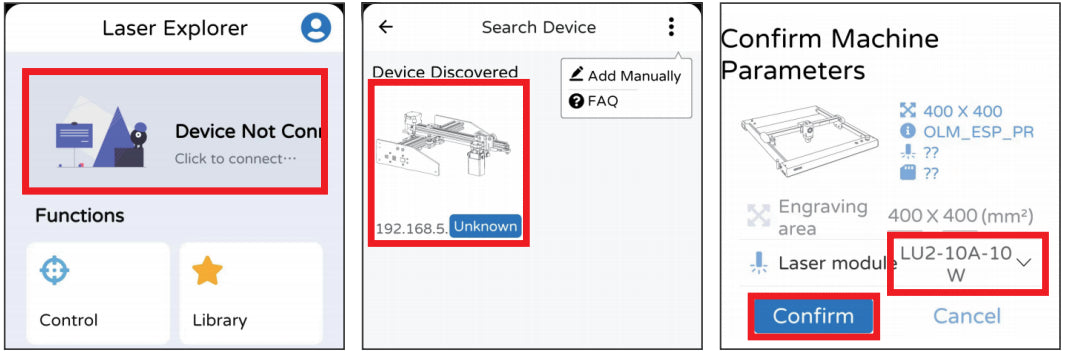
Click the options in the red box in order from left to right.
Note : The correct laser module must be selected!
The phone and the machine are in the same local area network.
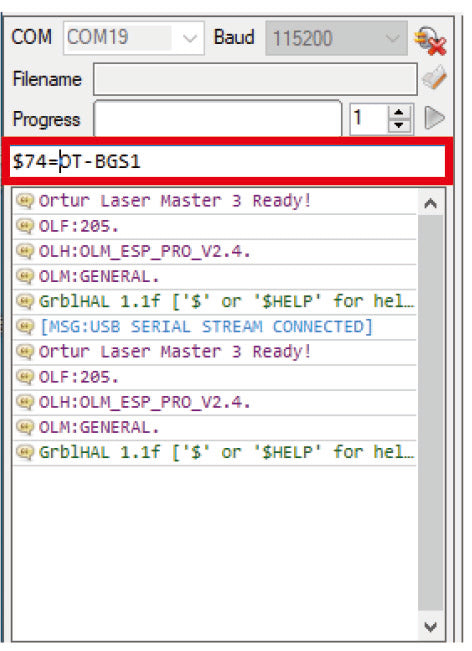
1. Connect the machine to LaserGRBL, enter "$74=WiFi name" in the red box, and then click Enter.
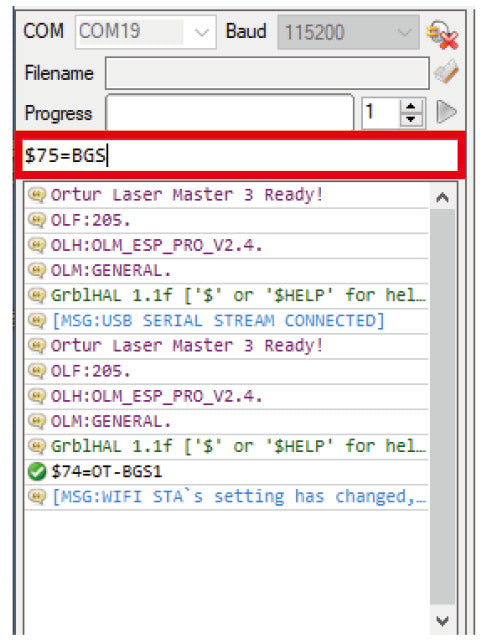
2. Enter "$75=WiFi password" in the red box, then click Enter.
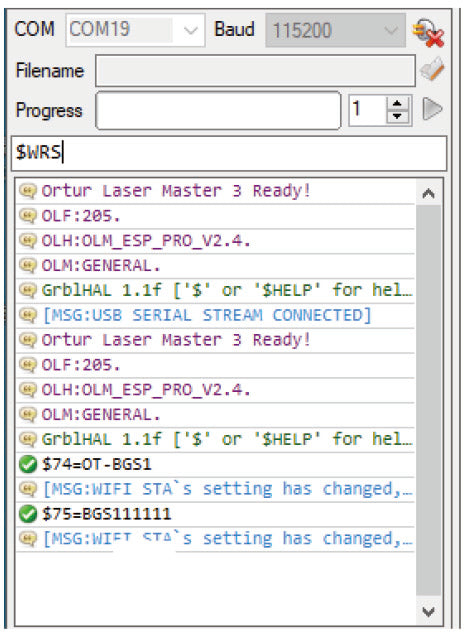
3. Enter "$WRS" in the red box, then click Enter.
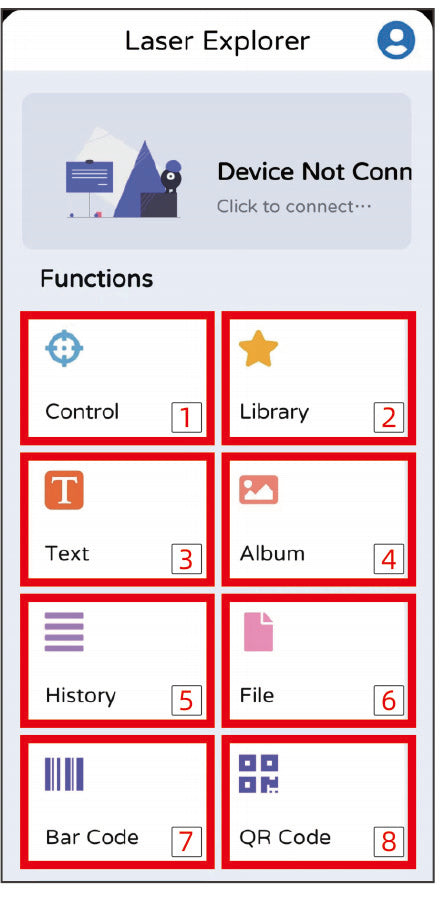
1. Control (Control the movement of the machine)
2.Library (software comes with images to choose from)
3.Text (software comes with a text editor)
4.Album (can view and select images in the phone album)
5.History (used data can be called directly)
6.File (can read engraving file)
7.Bar Code (software comes with barcode editor)
8. QR Code (the software comes with a QR code editor)
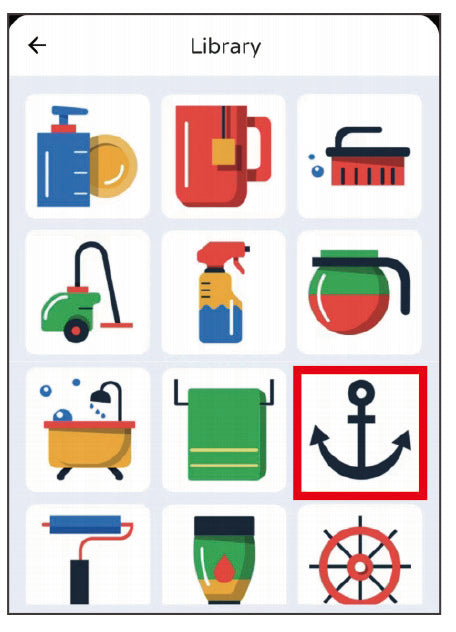
Choose an image arbitrarily.
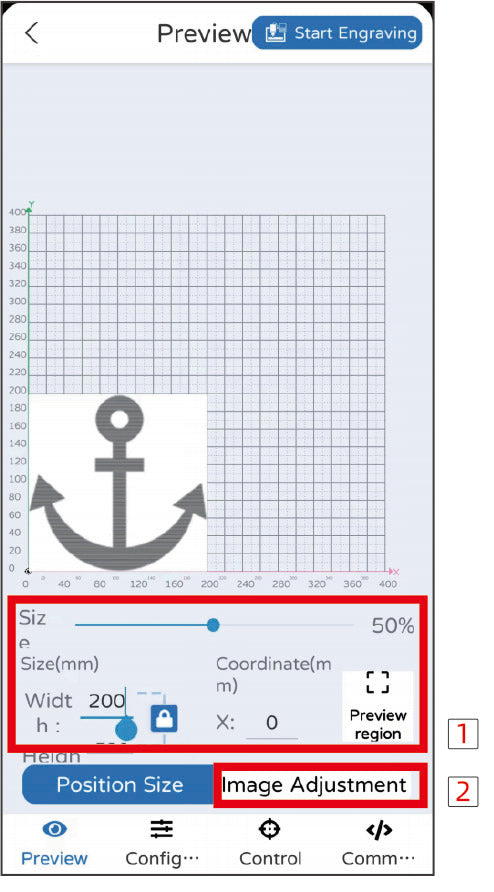
1. By modifying the parameters in the red box, you can change the size and position of the image, as well as the engraving range of the preview image.
2.Modify the parameters in the red box to change the brightness, contrast and black and white limits of the image.
Note: The parameters are for learning reference only, and the actual use will be affected by factors such as material and thickness! Please do more tests according to the actual situation!
Engraving & Cutting with the web controller
- connecting
- ggode files
- engraving or cutting
- 1
- 2
The machine is connected to the network (must be in the same LAN as the computer)

1. Connect the machine to LaserGRBL, enter "$74=WiFi name" in the red box, and then click Enter.

2. Enter "$75=WiFi password" in the red box, then click Enter.

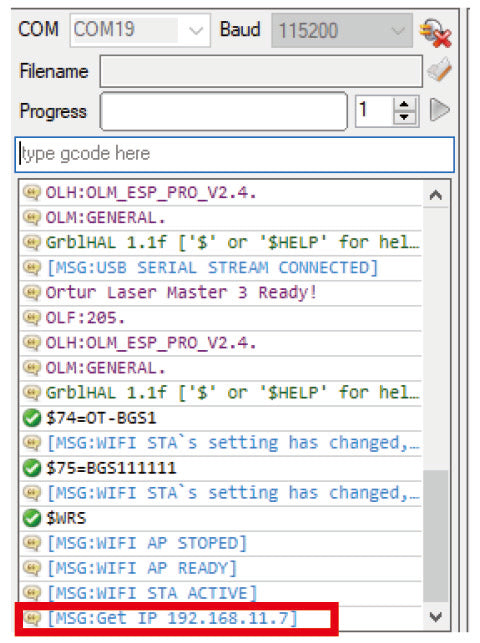
3. Enter "$WRS" in the red box, then click Enter.

4. The IP of the machine in the LAN.
The phone and the machine are in the same local area network.

1. Open a browser, enter the IP address of the machine, and hit enter.
2.Enter "admin" for the user and password to enter the operation interface.


1. After setting the parameters in the software, click "File" → "Quick Save".

2. Click "Save".

1. Click the button inside the red box to open the saved Ggode file.

2.Click "Open".

Please wait patiently until the file is loaded.

engraving & cutting with LaserGRBL
- 1.Connect
- 2.Unlock
- 3.Engraving
- 4.Cutting

Click the button in the red box to connect the software to the machine.

Click the button in the red box to unlock the grey buttons.


1. Click the "Import" button
2. Select the engraving image
3. Click "Open"

4. Brightness, contrast, black and white limit adjustment
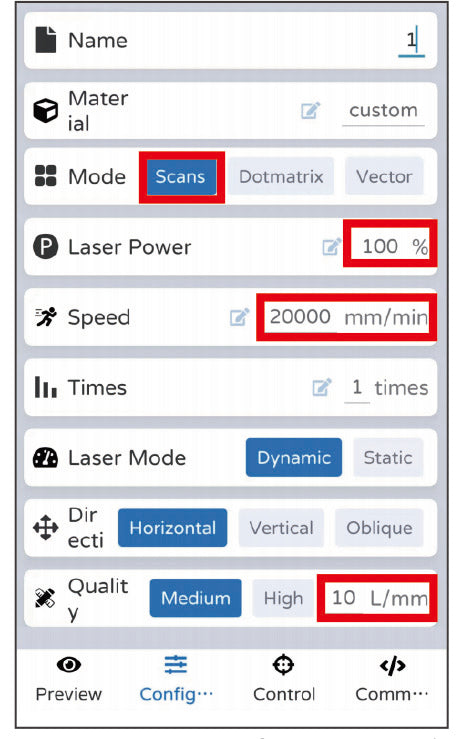
5. Select "Line to Line Trace"
6. The quality is modified to 10Lines/mm
7. Click "Next"

8. The Engraving Speed is modified to 20000mm/min
9. Select "M4-Dynamic Power" for laser mode
10. S-MAX 1000
11. The size can be modified according to your needs
12. Click "Create"
Note: The engraving parameters are only for learning and reference, and the actual use will be affected by factors such as materials and engraving images!

Click the button in the red box to view the engraving range, and then adjust the position according to the engraving range.


1. Select "Vectorize"
2. Click "Next"

3. The Border Speed is modified to 100mm/min
4. Select "M3-Constant Power" for laser mode
5. S-MAX 1000
6. The size can be modified according to your needs
7. Click "Create"
Note 1: The cutting parameters are for learning and reference only, and the actual use will be affected by factors such as material and thickness!
Note 2: The same material, such as wood, will have different effects due to different tree ages and resins. In order to achieve the best results, multiple attempts are required!

Click the button in the red box to view the engraving range, and then adjust the position according to the engraving range.

engraving & cutting with Lightburn
- 1.Connect
- 2.Engraving
- 3.Cutting

Click the "Create Manually".

Click the "GRBL", then click "Next".

Click the "Serial/USB", then click "Next".

Modify "X Axis Length" and "Y Axis Length" to 400mm.

Select the origin "Front Left", turn on the machine and it will auto home, then click "Next".

Click the "Finish".

Click the "OK"

Select "COM19".

Connection succeeded.
Click the button in the red box to connect the software to the machine.

Click the "Open" button.

Select the engraving image, then click "Open".

1. Click the "Cuts / Layers".
2. Modify the speed to 20000, "Pass Count" to 1, and "Power Max" to 100.
(Note that the unit is mm/m)
Note: The engraving parameters are only for learning and reference, and the actual use will be affected by factors such as materials and engraving images!

1. The coordinates of the center point of the engraving range
2. Engraving image size
3. Engraving image size ratio
4. The effective engraving range of the machine

You can draw lines using the tools included with the software, or import an existing line file.
The cut image must be lines!

Modify the speed to 100, "Pass Count" to 1, and "Power Max" to 100.
(Note that the unit is mm/m)

1. The coordinates of the center point of the engraving range
2. Engraving image size
3. Engraving image size ratio
4. The effective engraving range of the machine

Click the button in the red box to start cutting.
Click here to learn more: Web UI operation tutorial
Can't find an answer to your question?
We are always here for you!
We're here to provide you with more information, answer any questions you may have.
Whatsapp:+8616670494147 or e-mail us at support@sinismall.com
Have problems about machines using?
Our services
Don't worry when you buy a whatever you need, we've got it, we've got a service for you.
After-Sales Team
Professional support

24 Hours Delivery
3-7 Days to receive goods

Free Delivery
Free delivery and returns

Warranty
1-Year warranty policy